一,List容器介绍
list容器的本质上是一个双向带头循环链表,节点在物理空间上是不连续的,list的节点在堆上分散分配,每个节点包含数据、前驱指针和后继指针。
特点:
1,插入和删除极快,不需要挪动元素
2,不支持随机访问
3,空间开销较大,每个元素需要额外开辟两个指针
二,List的构造函数
list的四种构造
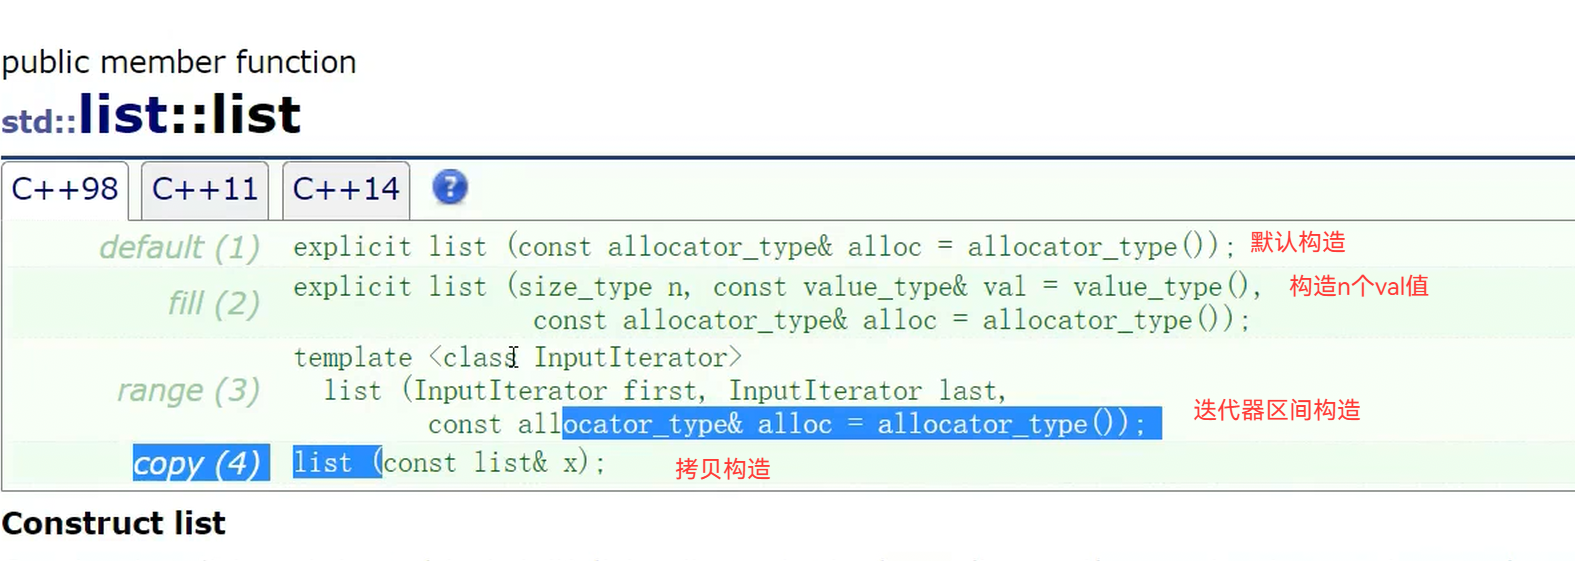
list的大部分功能都和之前的容器string和vector有相似性,这里就不在过多阐述,具体可以看一看我前两期的博客:
string类的使用:
掌握 vector 的增删遍历
下面看一下和前面容器不同的地方:
1,迭代器部分
先看一下迭代器的分类:
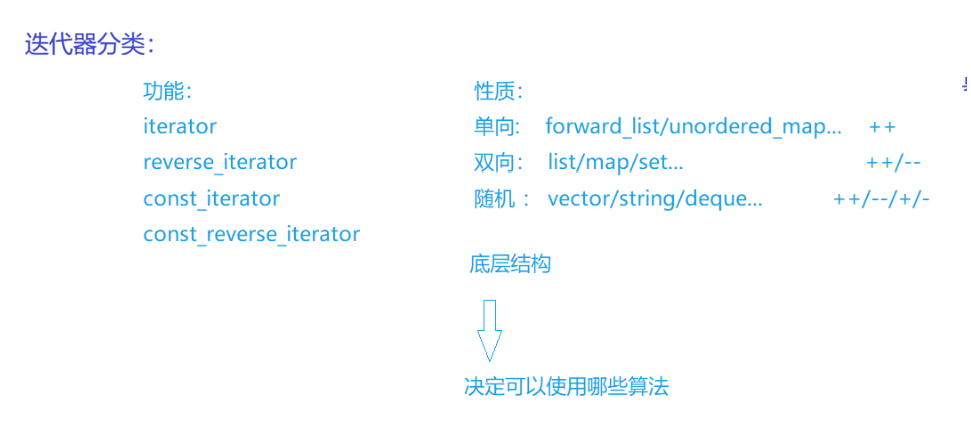
由上表可知,list使用的是双向迭代器,不支持+,-操作
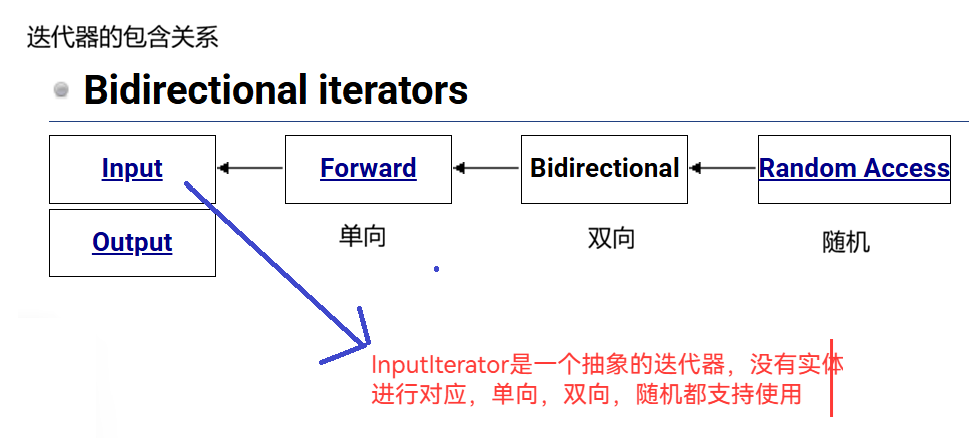
从右边到左边,功能依次减小
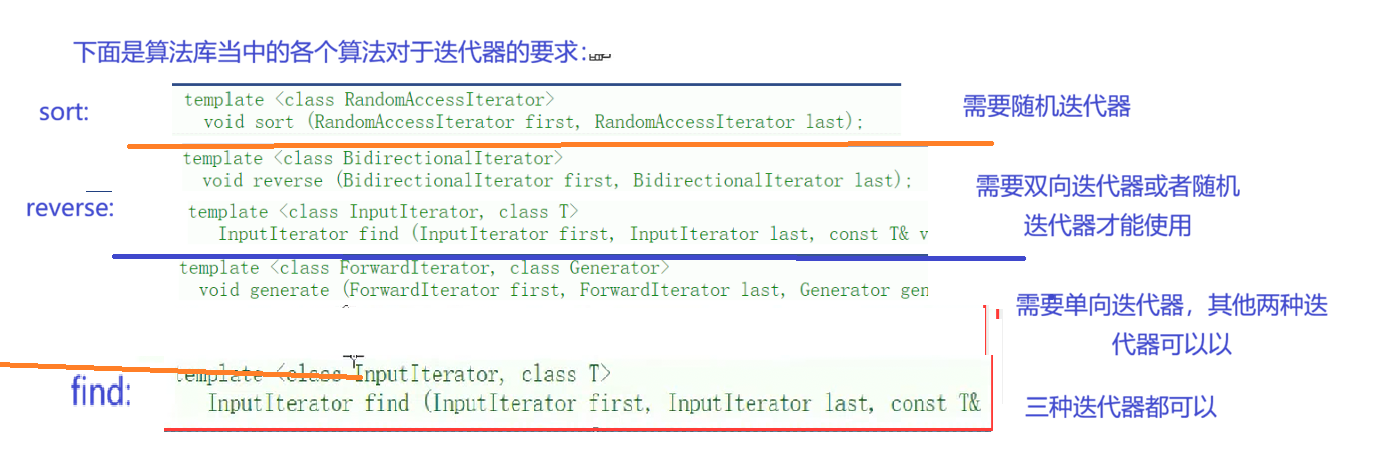
而算法库当中的算法对迭代器的要求不同,使得一些容器不能使用某些算法
例如:
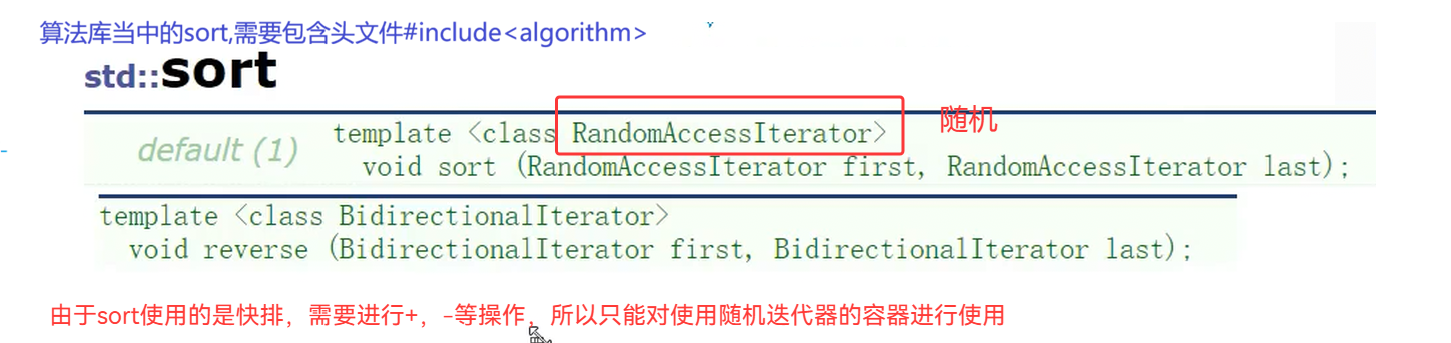
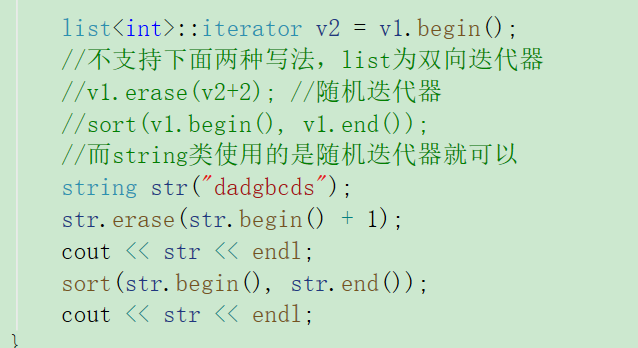
上面sort需要随机迭代器才能使用,但是list容器的迭代器是双向迭代器,因此list不能使用算法库当中的sort
再举几个例子:
代码展示:
2,函数部分
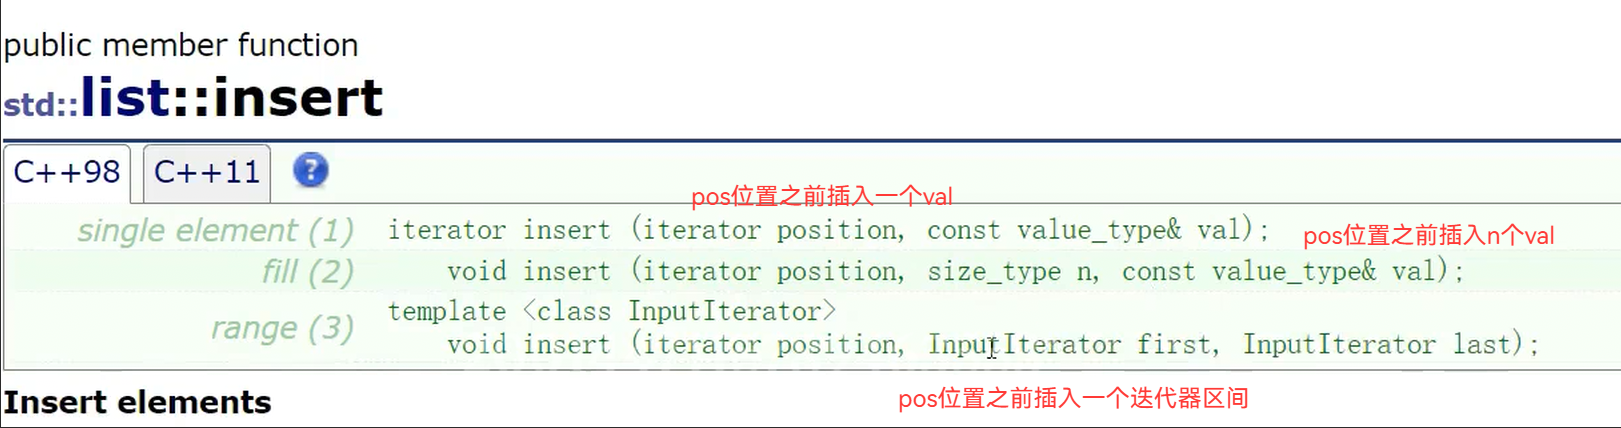
1,insert插入
1void test03()
2{
3	list<int> it;
4	it.push_back(1);
5	it.push_back(2);
6	it.push_back(3);
7	it.push_back(4);
8	it.push_back(5);
9	it.push_back(6);
10	for (auto ch : it)
11	{
12		cout << ch << " ";
13	}
14	cout << endl;
15	//在指定位置插入数据
16	auto v = it.begin();
17	int k = 3;//在begin()+3前插入数据
18	while (k--)
19	{
20		v++;
21	}
22	it.insert(v, 34);
23	for (auto ch : it)
24	{
25		cout << ch << " ";
26	}
27	cout << endl;
28}
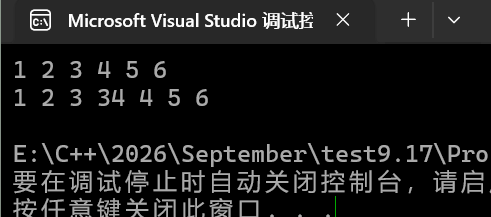
运行结果:
2,删除元素erase
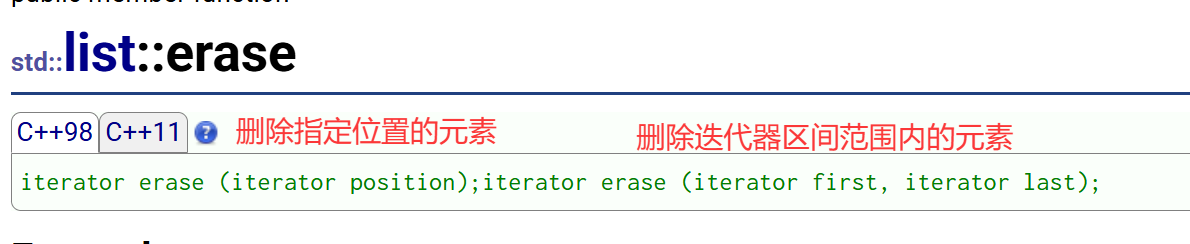
1void test00()
2{
3	list<int> it;
4	it.push_back(1);
5	it.push_back(2);
6	it.push_back(3);
7	it.push_back(4);
8	it.push_back(5);
9	it.push_back(6);
10	for (auto ch : it)
11	{
12		cout << ch << " ";
13	}
14	cout << endl;
15	//删除指定元素
16	int x;
17	cin >> x;
18	auto f1 = find(it.begin(), it.end(), x);
19	if (f1 != it.end())
20	{
21		it.erase(f1);
22	}
23	for (auto ch : it)
24	{
25		cout << ch << " ";
26	}
27	cout << endl;
28}
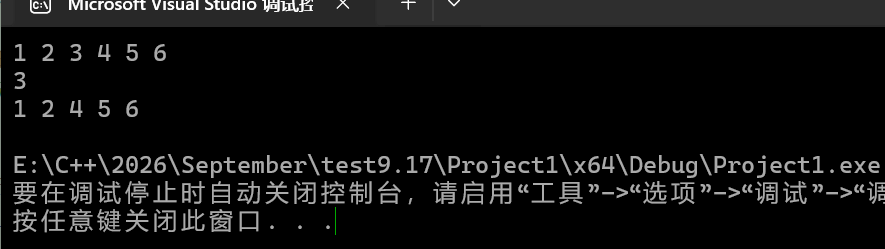
运行展示:
3,排序sort和逆置reverse
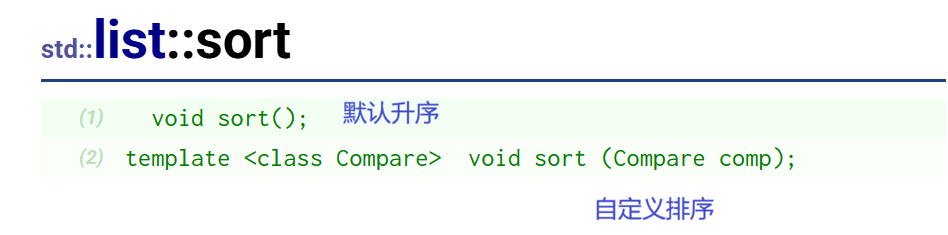

注意:reverse的两个参数是迭代器区间,但是reverse的区间为[first , last),last指向的是翻转区间的下一个元素,实际翻转时只会翻转first到last的前一个元素这个范围内的数
1//排序和翻转
2void test04()
3{
4	list<int> it;
5	it.push_back(1);
6	it.push_back(20);
7	it.push_back(3);
8	it.push_back(4);
9	it.push_back(5);
10	it.push_back(3);
11	it.push_back(5);
12	it.push_back(6);
13	for (auto ch : it)
14	{
15		cout << ch << " ";
16	}
17	cout << endl;
18
19	//进行排序
20	it.sort(); //正序
21	//sort(it.begin(), it.end()); //无法使用算法库当中的sort
22
23	//翻转--两种都可以
24	//it.reverse();//list的翻转
25	reverse(it.begin(), it.end());//算法库当中的翻转--反转后为逆序
26
27	for (auto ch : it)
28	{
29		cout << ch << " ";
30	}
31	cout << endl;
32}
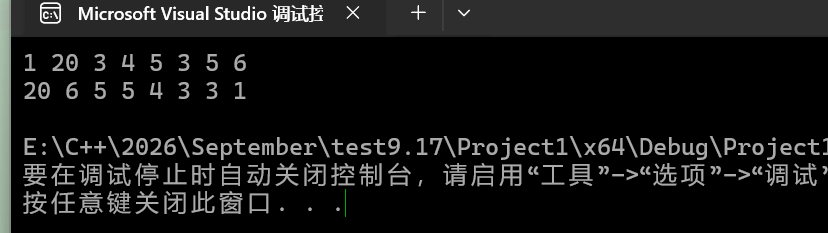
运行结果:
4,链表合并merge
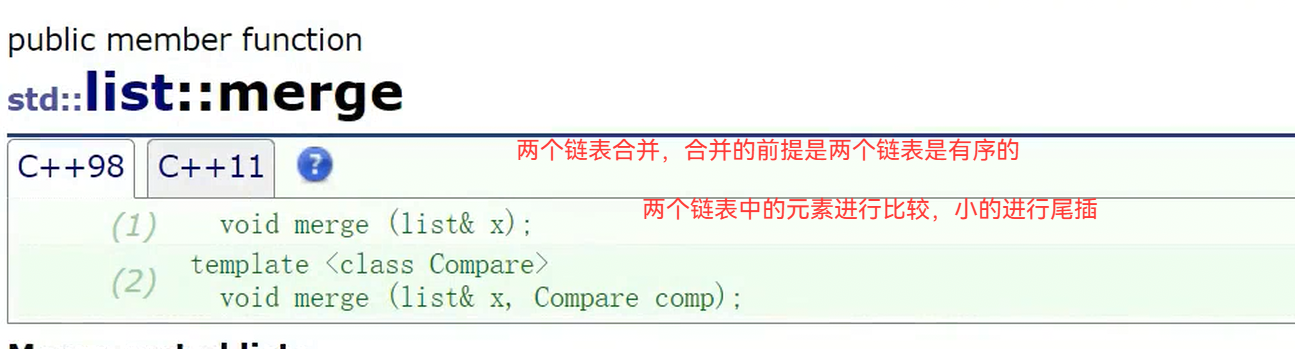
代码部分:
1//merge
2void test004()
3{
4	std::list<double> first, second;
5	first.push_back(1.2);
6	first.push_back(4.1);
7	first.push_back(5.6);
8	first.push_back(3.4);
9	second.push_back(2.1);
10	second.push_back(6.7);
11	second.push_back(8.6);
12	second.push_back(9.2);
13	//先进行排序
14	first.sort();
15	second.sort();
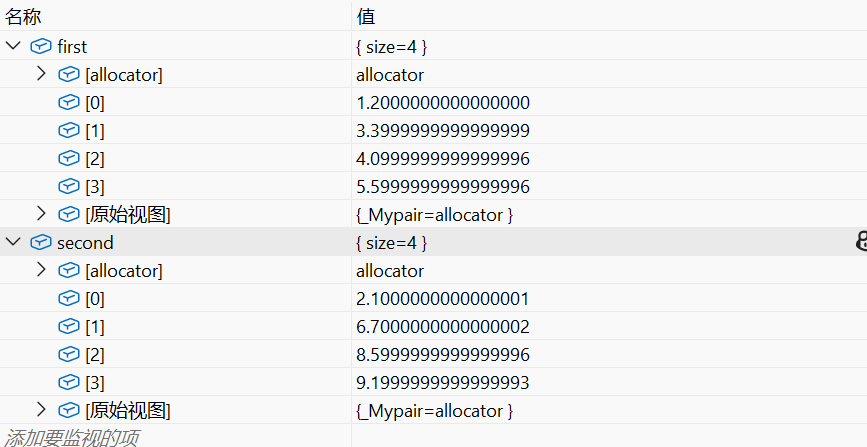
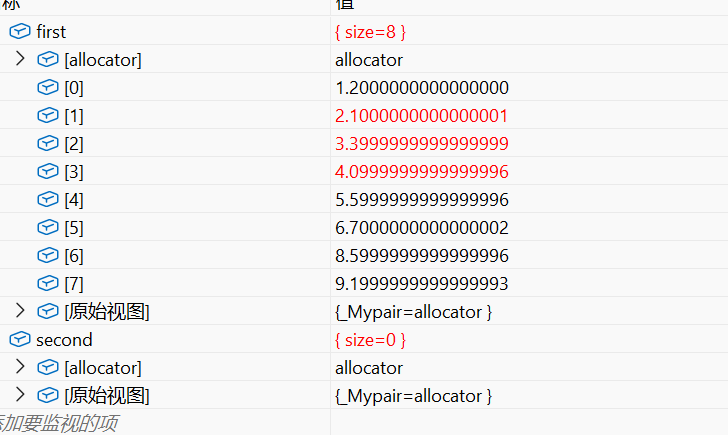
16	//粘接(剪切粘贴)--将second中的值直接拿到first当中
17	first.merge(second);//粘接后second中的内容为空
18	for (auto ch : first)
19	{
20		cout << ch << " ";
21	}
22	cout << endl;
23}
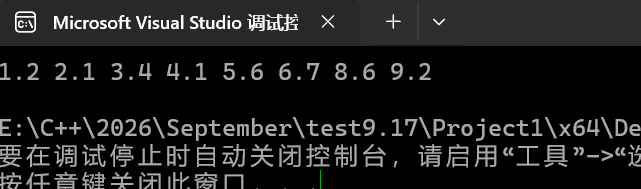
运行结果:
运行这一行前:
运行后:
5,去除重复元素unique
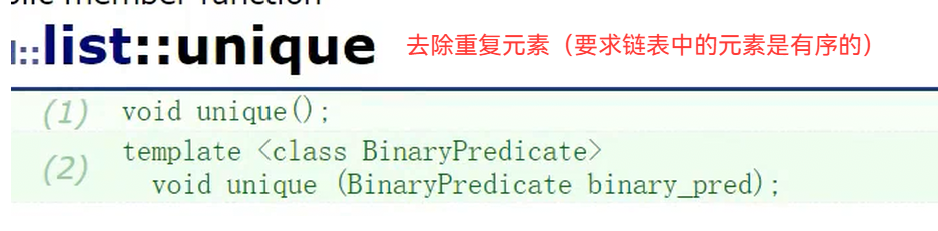
代码展示:
1//unique删除重复的元素--需要有序,相同的元素紧挨着
2void test05()
3{
4	list<int> it;
5	it.push_back(1);
6	it.push_back(2);
7	it.push_back(3);
8	it.push_back(2);
9	it.push_back(4);
10	it.push_back(3);
11	it.sort();
12	for (auto ch : it)
13	{
14		cout << ch << " ";
15	}
16	cout << endl;
17	it.unique();
18	for (auto ch : it)
19	{
20		cout << ch << " ";
21	}
22	cout << endl;
23}
24
运行结果:
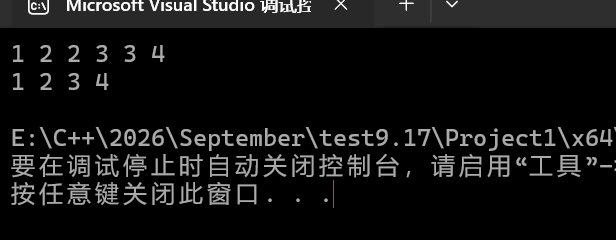
6,链表元素转接splice
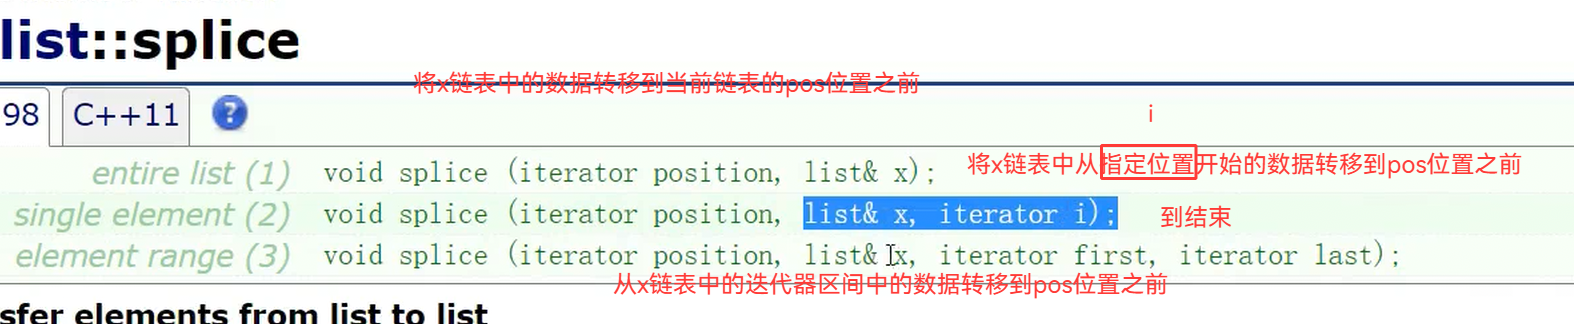
可以对不同的链表进行上面的操作
也可以对自己进行上面的操作
代码展示:
1//splice链表转接
2void test06()
3{
4	list<int> first1, first2;
5	list<int>::iterator ch;
6	for (int i = 1;i < 7;i++)
7	{
8		first1.push_back(i);
9	}
10	for (int j = 1;j < 5;j++)
11	{
12		first2.push_back(j * 10);
13	}
14	ch = first1.begin();
15	ch++;
16	//转接到2之前
17	first1.splice(ch, first2);//转接后first2为空
18	for (auto ch : first1)
19	{
20		cout << ch << " ";
21	}
22	cout << endl;
23
24	//splice可以用于自己--调节元素的顺序
25	list<int> it;
26	it.push_back(1);
27	it.push_back(2);
28	it.push_back(3);
29	it.push_back(2);
30	it.push_back(4);
31	it.push_back(3);
32	for (auto ch : it)
33	{
34		cout << ch << " ";
35	}
36	cout << endl;
37	int x = 0;
38	cin >> x;
39	ch = find(it.begin(), it.end(), x);
40	//将遇到的首个x元素后面的数据放到指定位置
41	if (ch != it.end())
42	{
43		it.splice(it.begin(), it, ch, it.end());
44	}
45	for (auto ch : it)
46	{
47		cout << ch << " ";
48	}
49	cout << endl;
50}
运行结果:
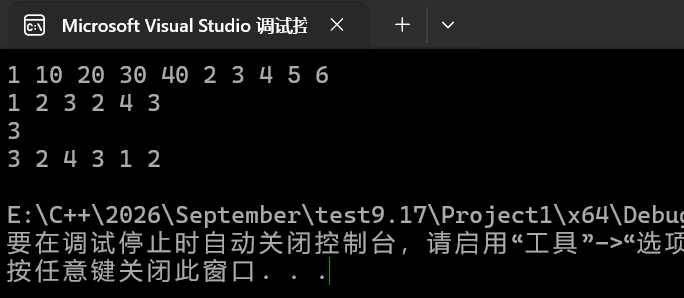
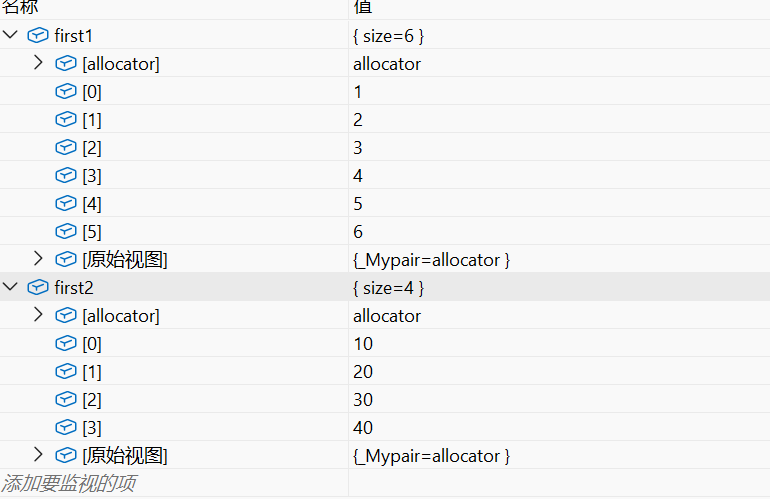
执行下面指令的对比:

执行前 :
执行后:
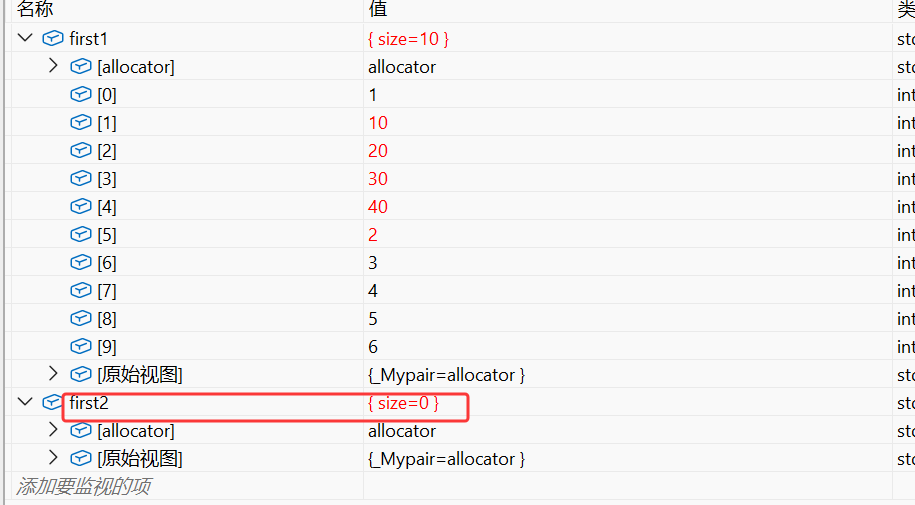
执行后变成了0,说明不是简单的复制粘贴,而是剪切
《【C++】双向奔赴的链表:list 使用全指南string类的使用:掌握 vector 的增删遍历》 是转载文章,点击查看原文。